Back to INTELLLEX
Admin Rights
We understand the number of documents and number of categories that you manage on our platform will inevitably grow. Without proper management, the sheer volume of documents might eventually clutter your search experience with increasing number of irrelevant results.
Admin users now have the ability to manage categories on a firm-wide level:
- Create new categories and sub-categories
- Perform full suite of actions: Create, Rename, Delete, Merge and Nest user-created categories (labelled 'USER-CREATED') of your firm's documents.
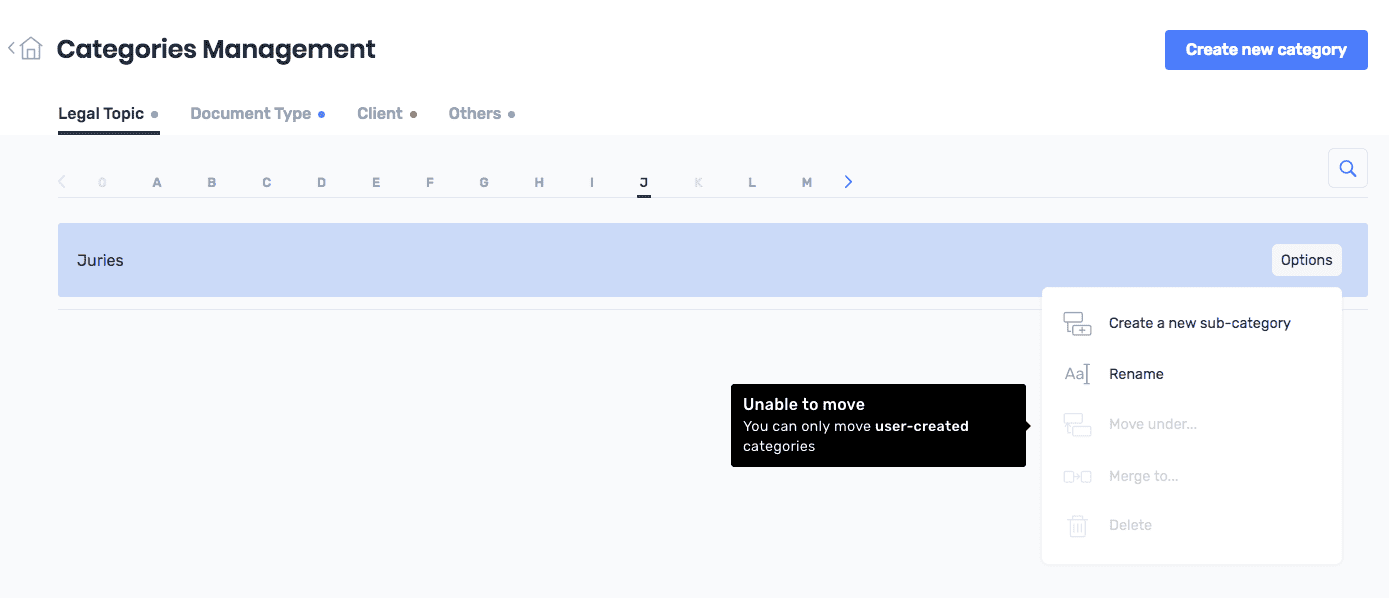
- Rename default categories (not labelled and from the INTELLLEX category list)
For default categories, Admin users can only Rename or Create new sub-categories under the default category. The other options are limited to user-created categories either by the Admin user or other users.
Create a New Category
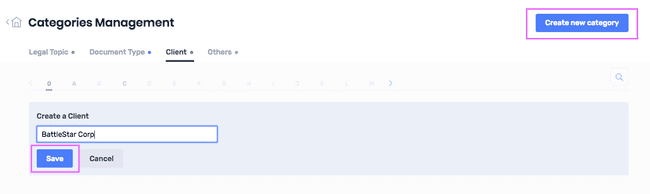
Example: You want to create a new firm-wide category called ‘Battlestar Corp’ under ‘Client’ to tag all documents related to this client.
-
Click on ‘Create new category’.
-
Key in the client name and save it.

Create a New Sub-category
Example: You want to create a new sub-category call ‘Crypto’ under the legal concept ‘Technology’ so as to standardise the way all crypto-related documents will be categorised in the future.
- Click on ‘Options’ and select ‘Create a new sub-category’.
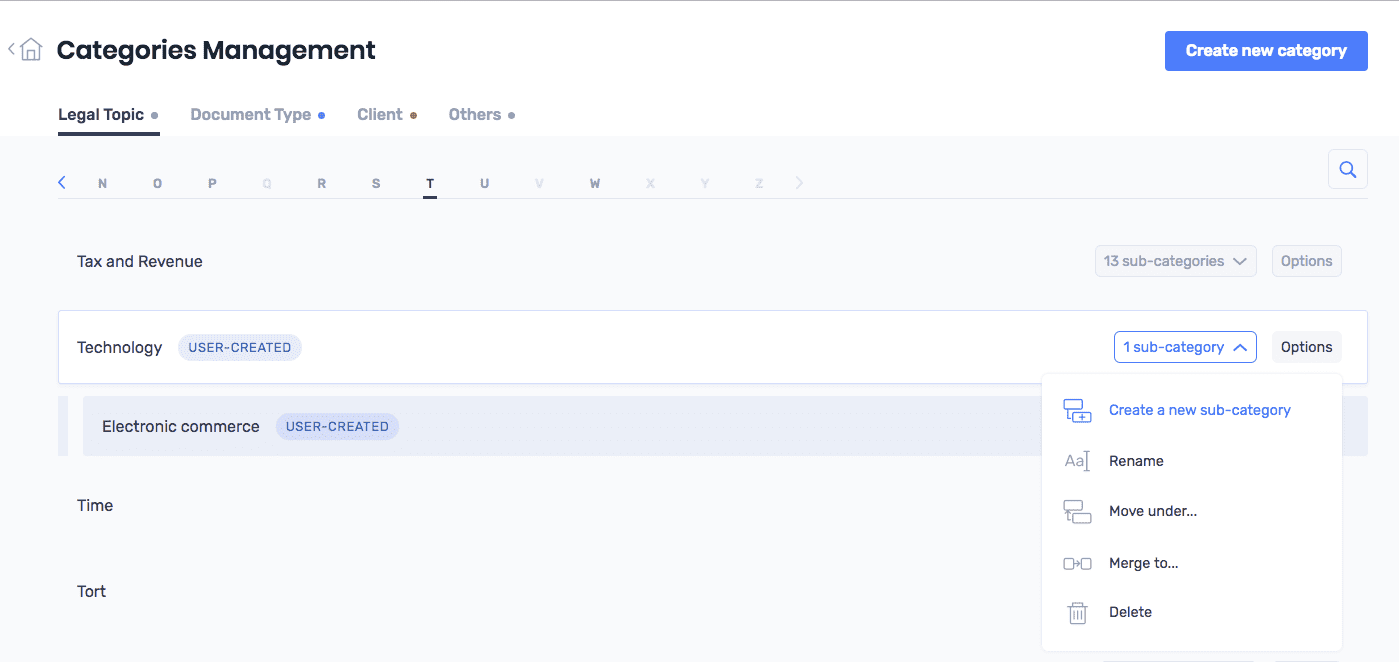
- Type in the sub-category name ‘Crypto’ and save it. There are now 2 sub-categories under ‘Technology’.
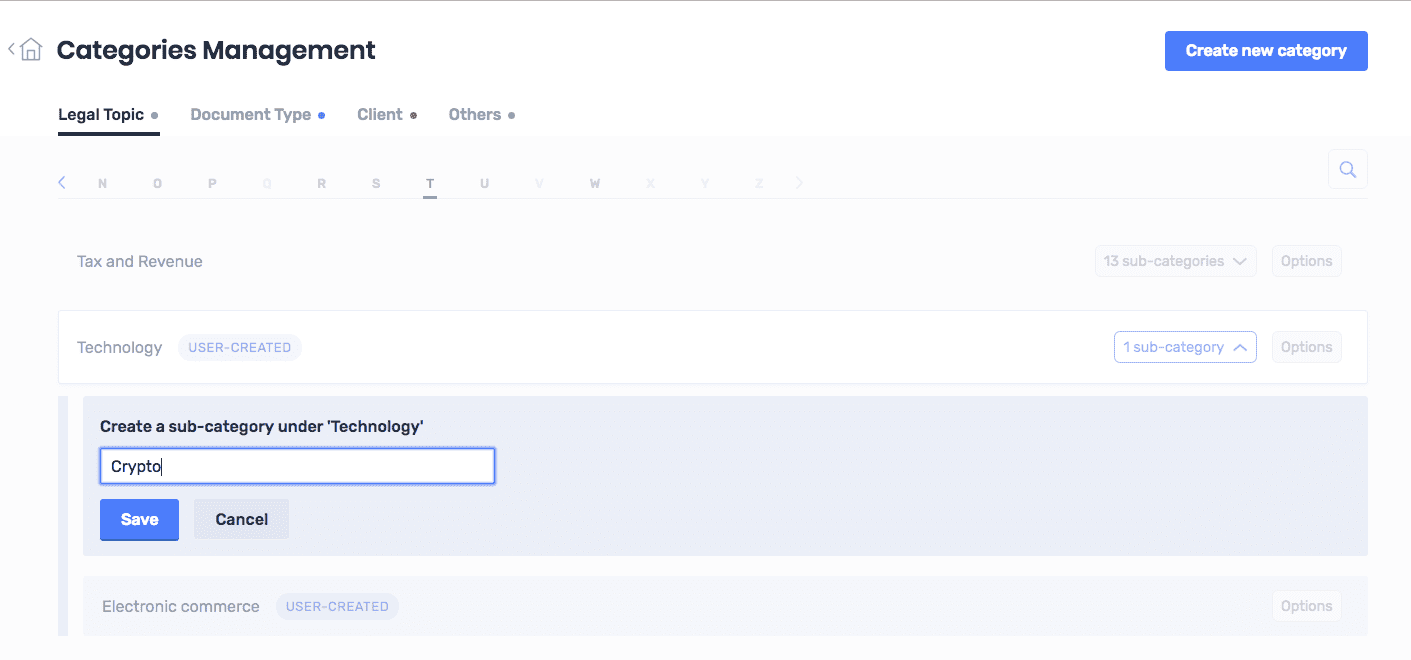
- You may create up to 3 levels of sub-categories, starting from the primary category ‘Technology’’ to the sub-category ‘Bitcoin’.
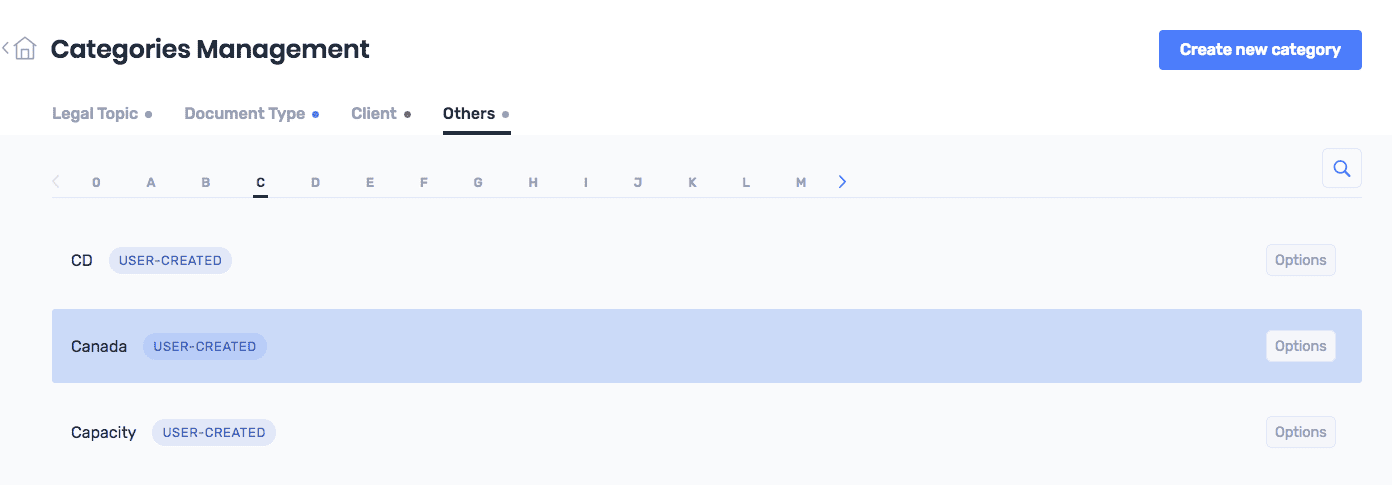
Merge and Rename User-created Categories
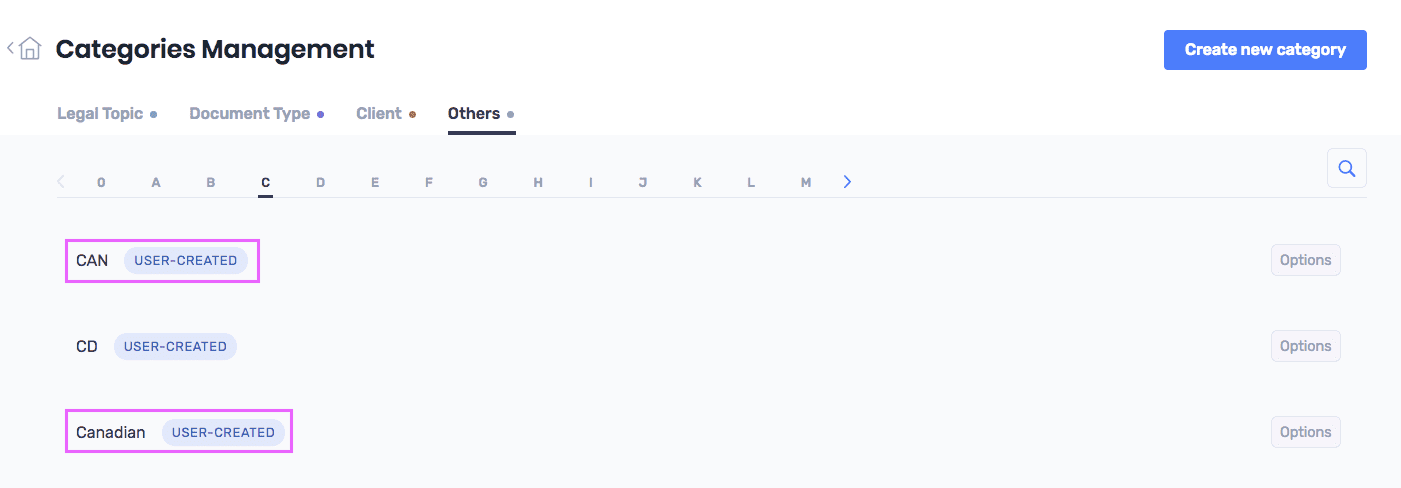
Example: You are doing a clean-up of firm-wide categories and noticed that some user-created categories are the same, notwithstanding misspellings or slight differences in the naming. You want to merge and standardise the naming conventions for those categories.
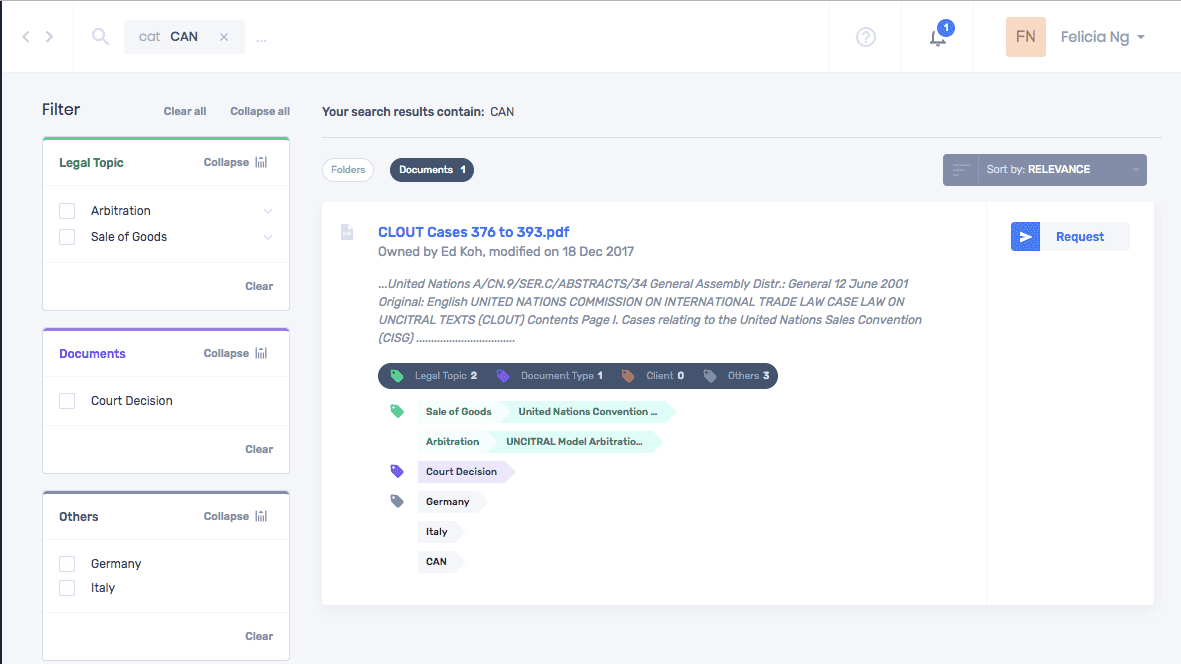
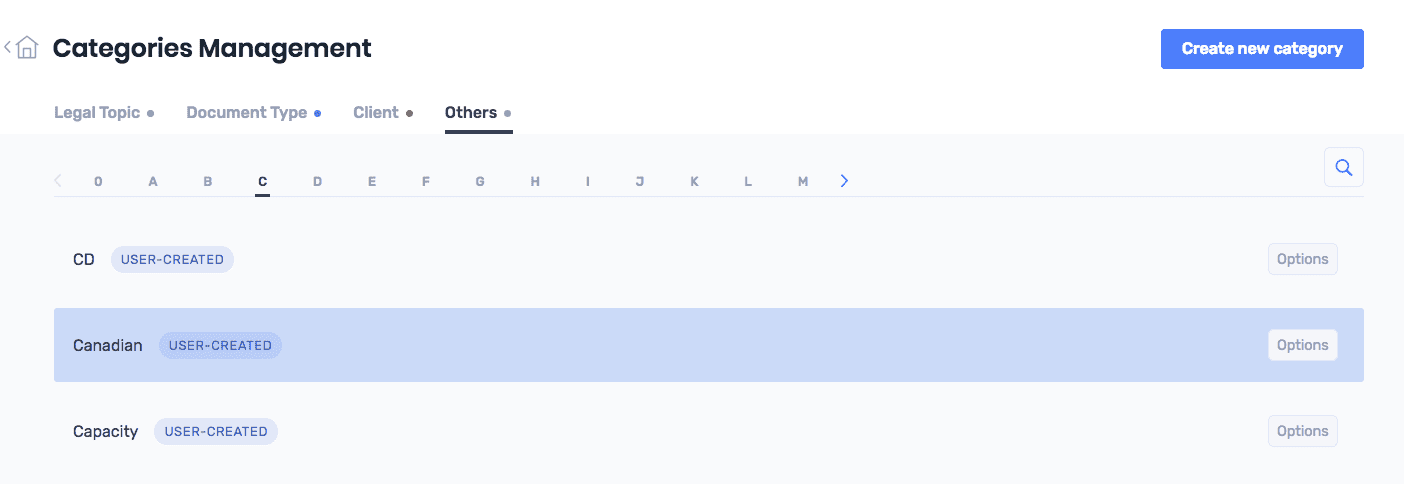
- For example, you want to merge the categories ‘CAN’ and ‘Canadian’ and rename the category to ‘Canada’.
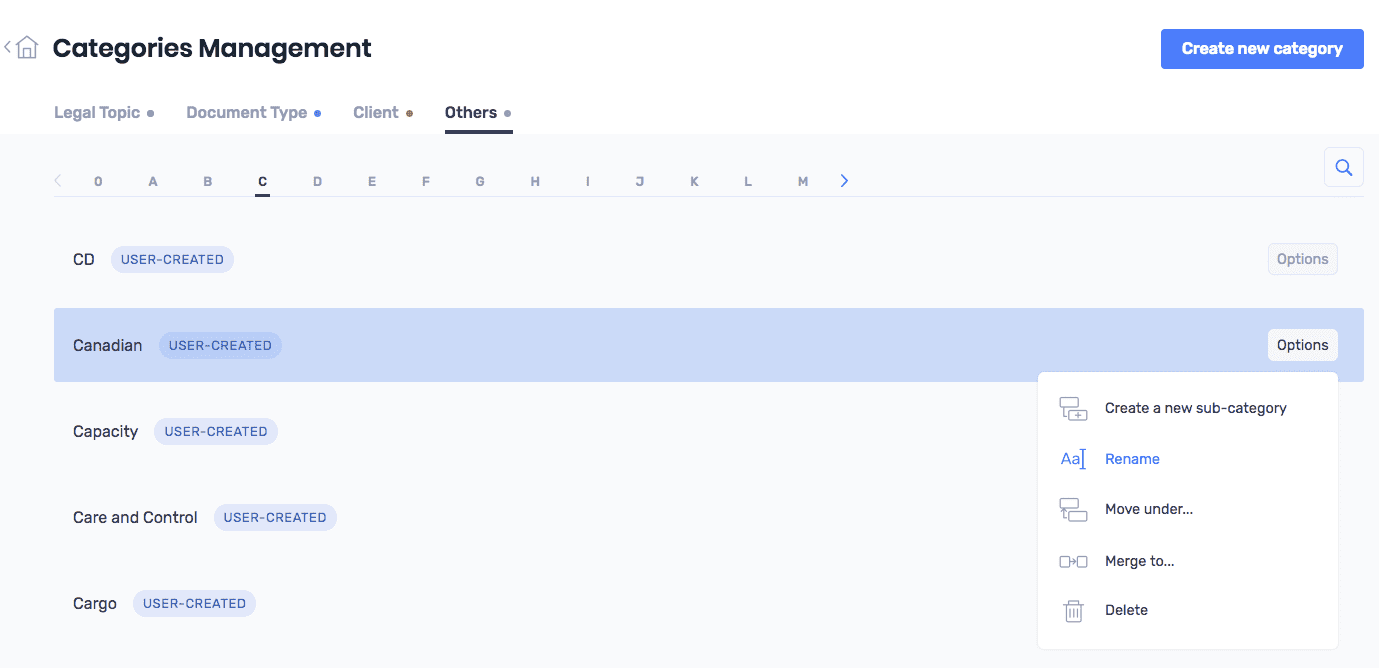
- For ‘CAN’, select ‘Options’, and then ‘Merge to...’.
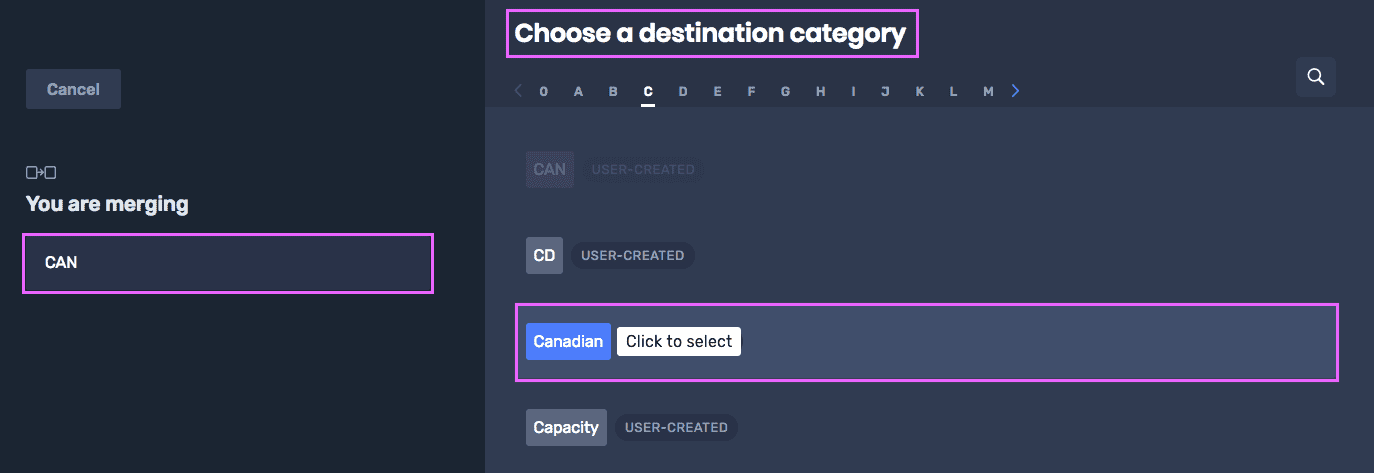
- This will bring you to a page to select the destination category you want to merge to. Select the category ‘Canadian’.
- You will be brought to the next page to confirm the action. You will be prompted if there are documents tied to the ‘CAN’ category, which will be updated as ‘Canadian’ after merging.
- You may review the document(s) in question by clicking on the blue document number.
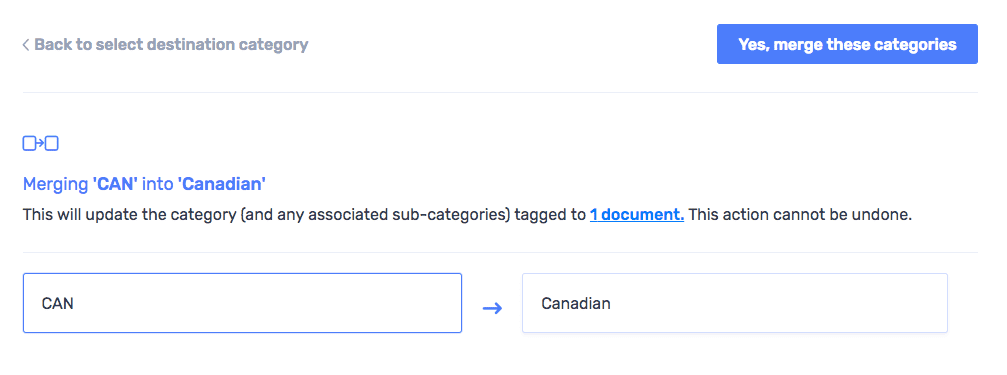
- This will launch a search in STACKS in a separate tab, with the documents under the search results.
- If you are certain you want to merge the category ‘CAN’ into ‘Canadian’, click on the blue button ‘Yes, merge these categories’. You will see that only the ‘Canadian’ category remains.
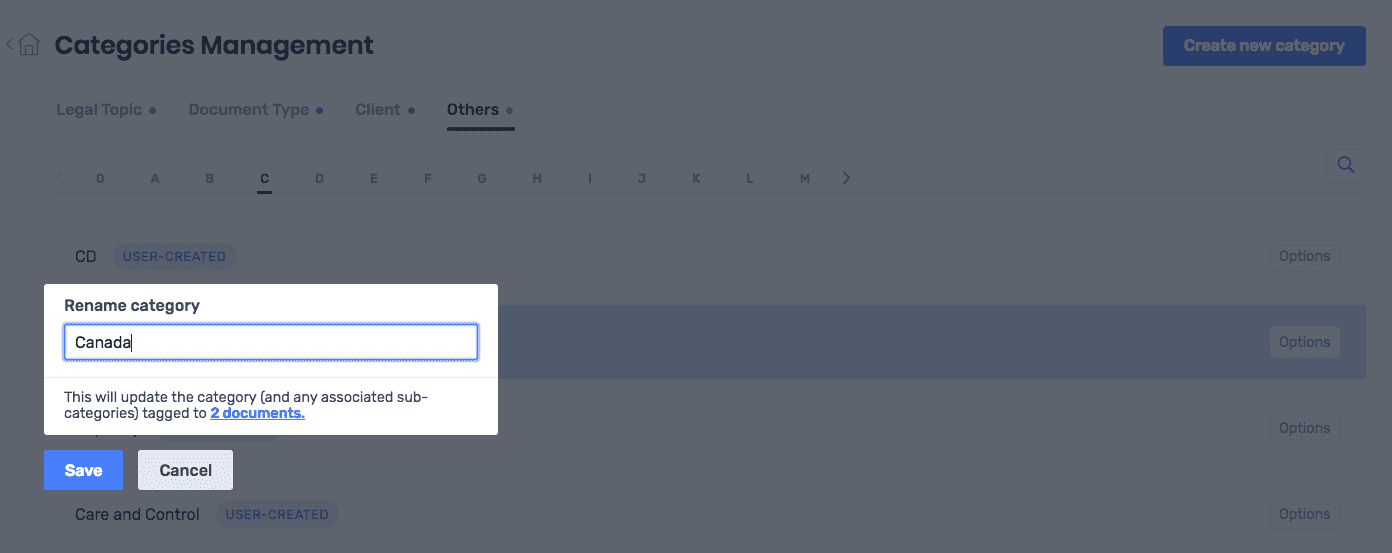
- To rename the category ‘Canadian’ to ‘Canada’, click on ‘Options’ and select ‘Rename’.
- It will prompt you that the two documents associated with ‘Canadian’ will have their category name changed. Click on the number of documents if you want to view them in a separate tab under STACKS search.
- Otherwise, just type the new category name ‘Canada’ and save it.
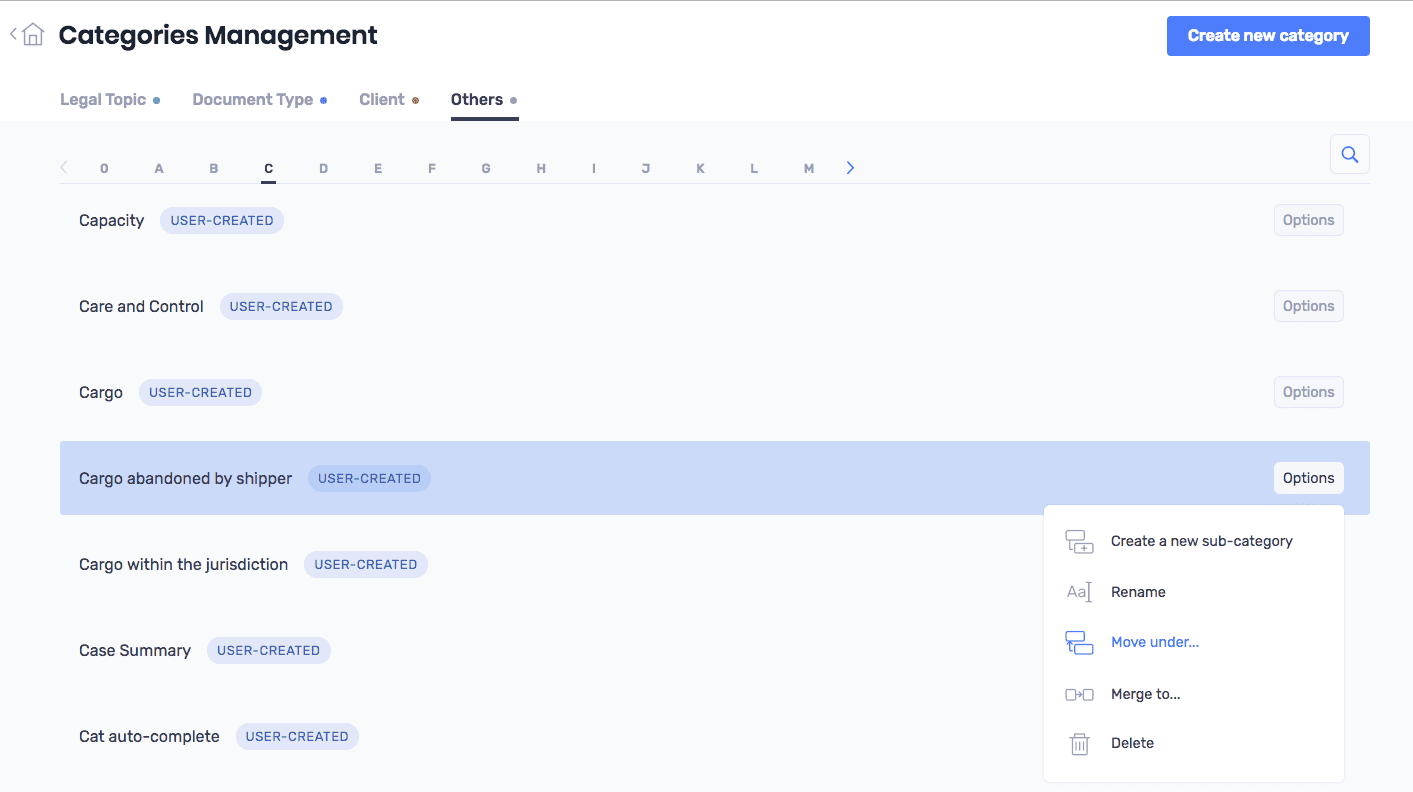
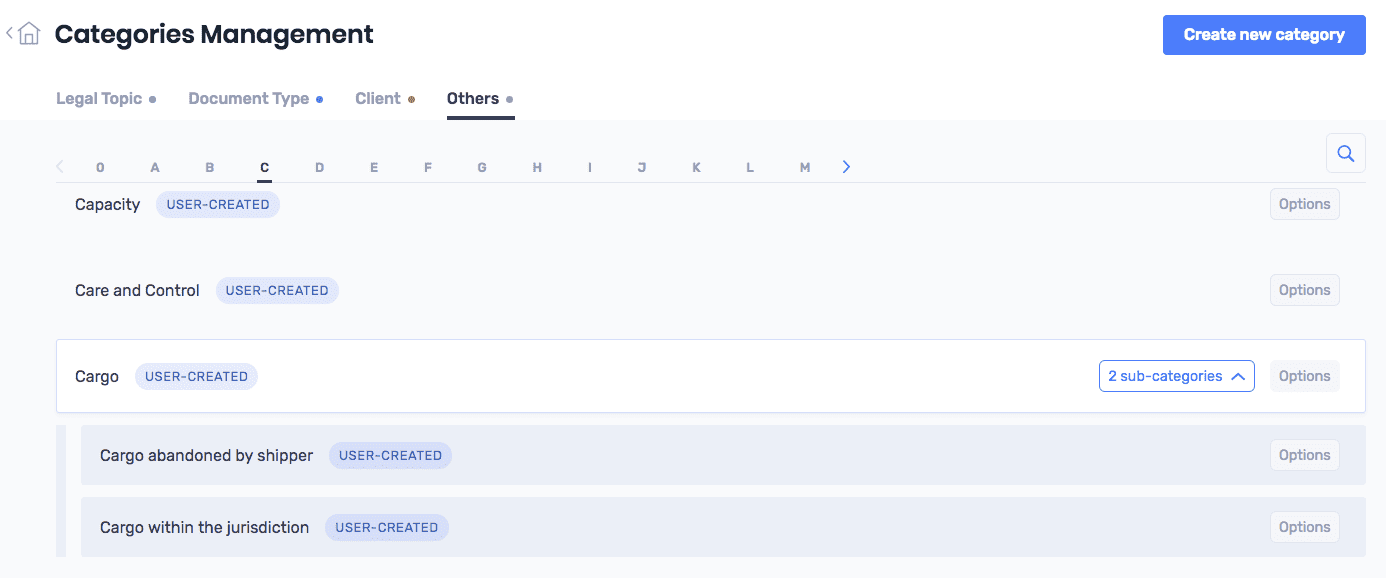
Nest User-created Categories
Example: One of your users created `Cargo abandoned by ‘shipper’ and ‘Cargo within the jurisdiction’ as separate categories. You want to Nest all 2 under the broad legal concept of ‘Cargo’, so as to improve knowledge discovery by other users.
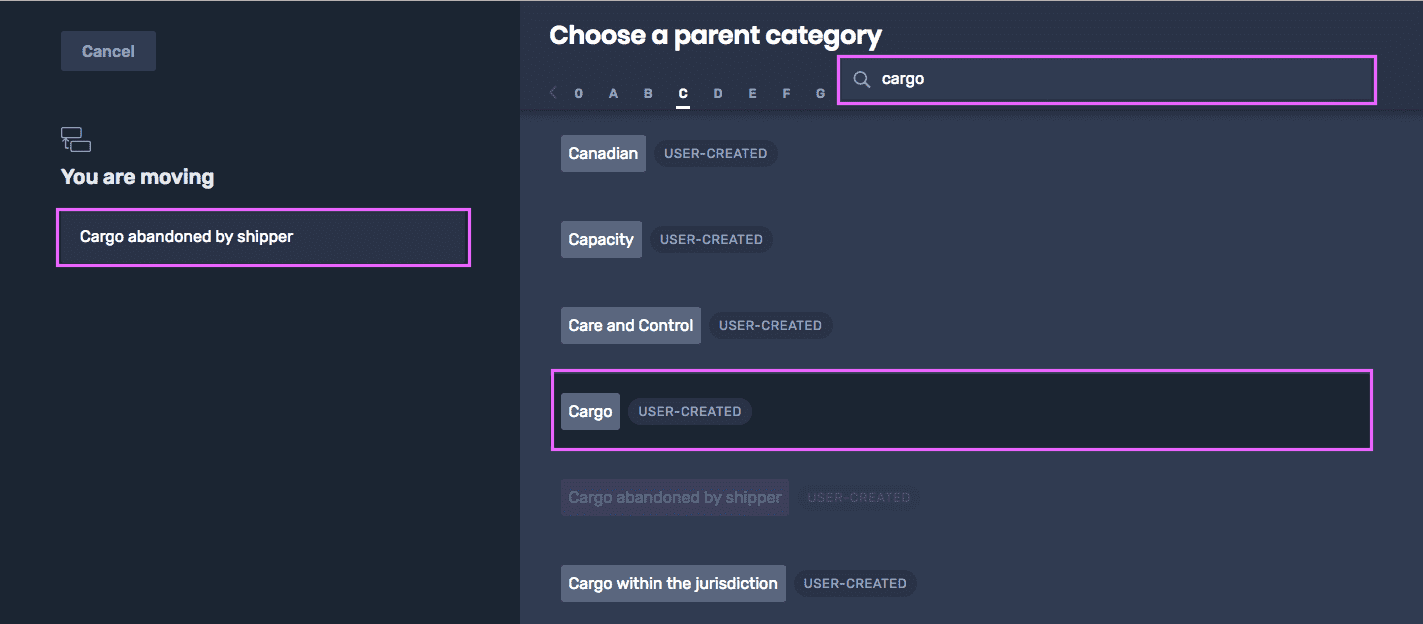
- Click on ‘Options’ for the category ‘Cargo abandoned by shipper’ and select ‘Move under…’
- You will be brought to a page to select the parent category. Either browse by alphabetical order or simply enter ‘Cargo’ in the search bar and select the right option from the suggestions.
- Click on ‘Cargo’ to select it as the parent category and you will be brought to the next page to confirm the action.
- Click on the button ‘Yes, move these categories’ to proceed or you can go back, if you have selected the wrong parent category.
- Do the same (steps 1-4) to move ‘Cargo within the jurisdiction’ under ‘Cargo’ as well.
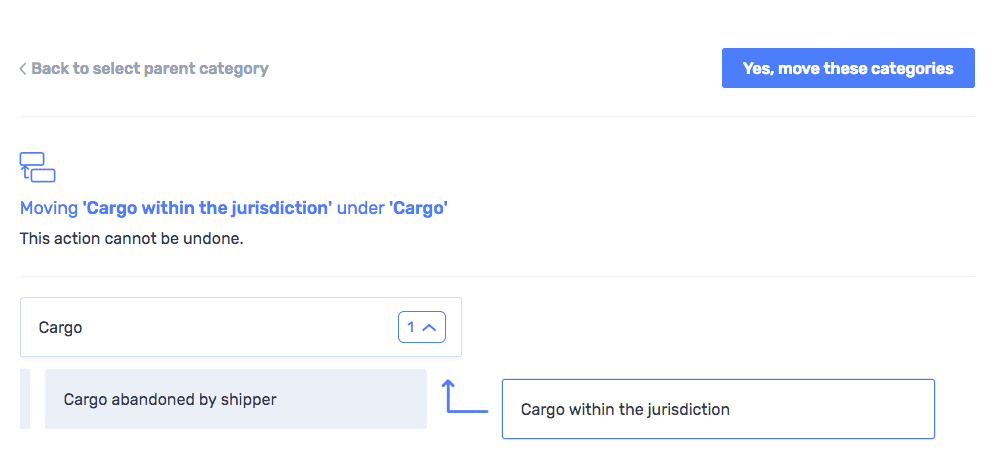
- Now, ‘Cargo’ has both sub-categories nested under it.
Convert to a Stand-alone Category
This function allows Admin Users to conveniently convert a user-created sub-category to a standalone category at the overarching level.
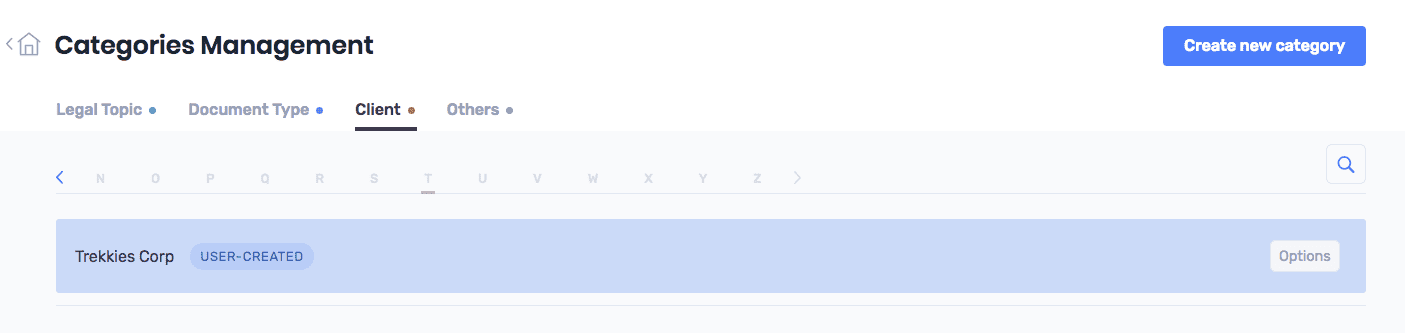
Example: You realised one of the users had accidentally filed a client ‘Trekkies Corp’ wrongly under another Client category ‘Battlestar Corp’
- Click on ‘Options’ to select ‘Convert to a stand-alone category’ for ‘Trekkies Corp’
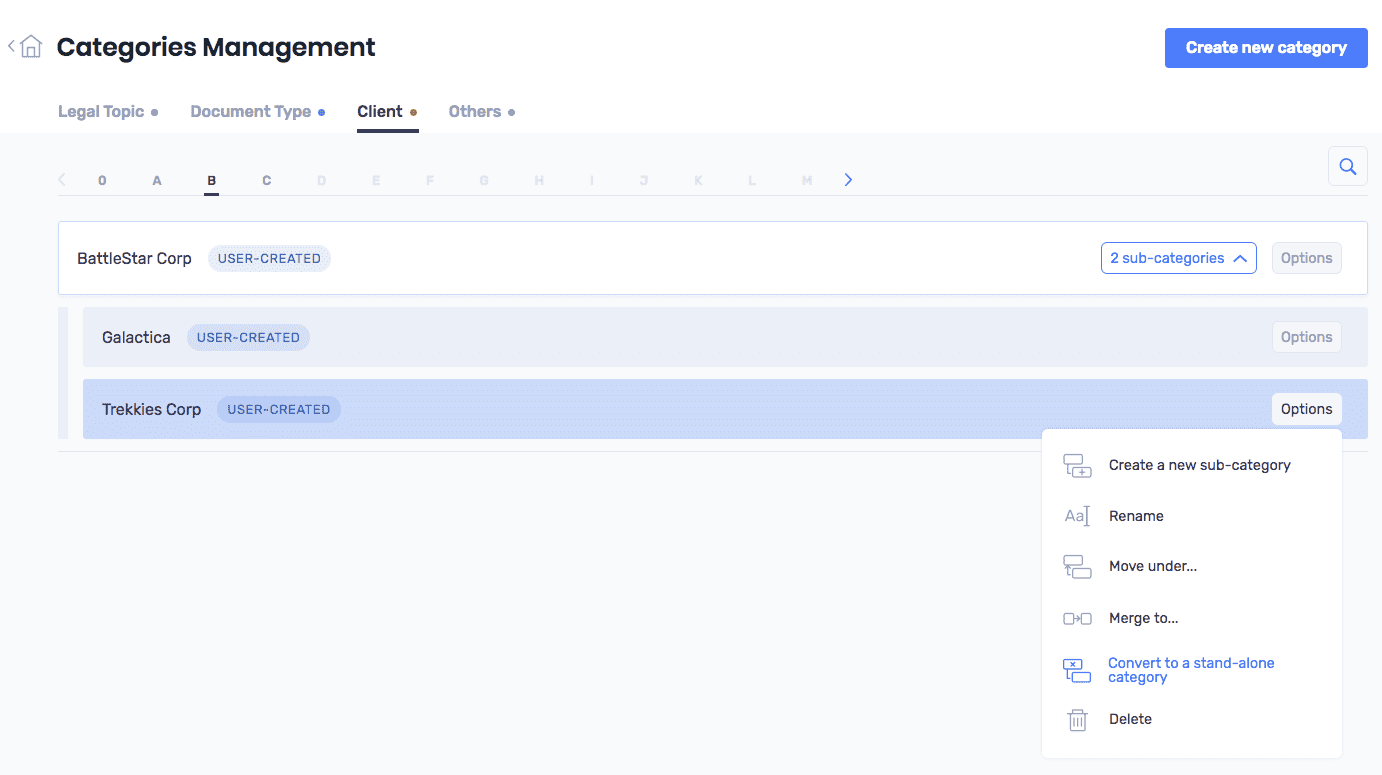
- ‘Trekkies Corp’ is now a stand-alone category.